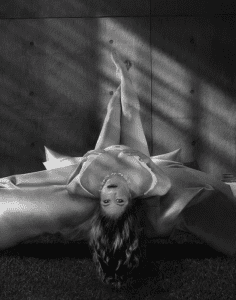
Someone asked for a tutorial on the image below so I will do my best to supply one. Since this was done quite a while ago it may not be exact but it will get you started and I hope it gives you some ideas. There is always more than one way to do anything in PS (Photoshop) so don’t be afraid to experiment.
The first thing you need to do is shoot some splashes. Set up your area and make sure you cover the floor with a lot of plastic. Setting up a kiddie pool will help to keep the water you are about to throw in one place. For splashes I typically use 2 lights, sometimes 3. My strobes are also for high speed photography. If you do not own high speed strobes, use some HSS (high speed sync) flashes. The flash duration will be much higher than standard strobes, allowing the freezing action of water.
If you do not own HSS flashes/strobes, standard ones will do but understand the water you capture will not be as sharp as you might like it.
For water splashes, I usually add a tiny touch of color, usually blue food coloring (if it’s too dark, add more water to your water storage container) and my light comes from behind the splashes. I will also set up a boom arm with a piece of string hanging down, this is my target area. I will focus my camera on this piece of string. You will need to do some cloning to remove the string in your finished splash.
Once you are set up, grab a cup and fill with water from your storage container, I usually use a gallon jug from the store. Bring the cup from a downward position and toss upward toward the string. Twisting your wrist a tiny bit helps to give different shapes to the splashes. Different styles of cups will also help give different shapes.
To capture the splash I use my left hand on a shutter release and the right hand to toss. I found remote shutter releases are too slow, that little lag will make you miss a lot of good shots. You may also decide to purchase an auto trigger wish work for splashes.
Even if you think you caught a good splash, keep going you might be pleasantly surprised. The more you toss and experiment the better you get at this. It’s a lot of working setting up for water splashes and cleaning up afterward, so shoot a bunch of good stock photos for later use.
This shot had potential but as you see the side was cut off, I just rebuilt it in Photoshop, not a big deal really. Take pieces from the splash and it’s easy enough to rebuild.

Starter Splash
- I opened the above splash into PS and started to clean it up and repair it. As I mentioned above, take a good piece of the splash onto a new layer, twist and turn it, fit it into place and clean your edges with a low opacity eraser. You can use your lasso tool to cut what you need. When you are happy with the results, merge with below layer.
- You will need to separate the splash from the background. you can use the eraser if you want or mask off what you don’t want. Since the edges of water splashes can sometimes show a tiny bit of movement, this is pretty easy to do with a brush or eraser. You don’t want to use a large tool, but not too small either, you don’t want the edges to look cut out. Using a brush or eraser, opposed to a lasso tool, will keep your round areas looking nice and not choppy. If you are new to this, don’t give up, keep trying until you get a good look, remember, nobody really knows what your splash looks like, if you get rid of too much who would know?
- Once your splash is cut out or masked, do CTRL T (transform tool) grab a corner and rotate the splash until it is in the position of a wing.
- At this point I would adjust the color. If you do not like the color at all, you can desat the color, then double click your layer, when the window opens, choose color, click next to it to get the color info window, choose color again from the drop down box and start choosing your color. You can also adjust colors in other manners too, like hue/saturation, levels, etc. Play around until you get what you want. Maybe you don’t know the color you want until you add it to another image.
- Adjust contrast and sharpen. I have found some splashes need more sharpening than others and some less. Don’t over sharpen, if you start to see white outlines appear, back off.
- Once you are happy with the improvements to your splash, make a duplicate layer, adjust this 2nd layer to add another dimension to your splash, such as a double wing.
- When you have one side of your wing done, (do not merge yet). Remember it’s a water wing, the back layer should show through the front layer a bit. Double click the front or top wing layer, open the blending options window, go through your blending options, see what results you get. You may need to add your background first, in order to get the right affect, so this is an area where you will have to play again and maybe go back to. You may also try adding a layer mask and with a low opacity brush, around 10/15, paint where the back wing should show through with black, make sure you click the layer mask to make sure it’s active.
- Put your desired background in. Add a new layer, under your wing, fill with white or black, double click the layer and choose gradient overlay, play with some color backgrounds or drag a ready made background behind your wings.
- Once you have all of this done, highlight your wing layers, right click and choose duplicate layers, go to edit, transform, flip horizontal, CTRL T and adjust the other side of wings.
- Until you merge each wing side, highlight the layers for one side and choose the chain tool at the bottom of your layers palette, this will lock the wings together so if you move one, both will move.
- Adjust both sides of your wing using CTRL T for each side to form a flying bug, bird, fly, whatever, once done you can now work on the body.
- Look for pieces on one of your wings, cut it out using your lasso tool, put it into place to form a body, legs, antennae, etc.
- Boom, a new flying bug (or whatever) has been produced. Now you can adjust colors as you wish. When you are happy, merge your left wing layers and your right wing layers.
- At the bottom of your layers palette, choose the button to make a new group, double click to name that group. Highlight all your body parts and drag into that group folder. You can do the same for each wing if you do not want to merge them right off.
This was my finished product but there are times where I use this same file and steal a wing or two for another image. Changing the color is easy. You can even change the shape a bit with the CTRL T tool or the warp tool, found under edit, transform. Be careful using the warp tool, you don’t want a blurry wing. Always keep a fresh copy handy in case you mess something up and can’t go back that far.

Finished Water Bug
If you feel I missed a step or have questions, please let me know, I’d be happy to answer whatever I could.
Happy shooting!


Comments are closed